WSL
WSL安装Ubuntu
来源
- 直接在微软商店安装ubuntu即可
迁移
由于默认安装到C盘下的
C:\Users\<username>\AppData\Local\Packages\CanonicalGroupLimited.Ubuntu<version>onWindows_<code>目录下,所以最好进行迁移迁移步骤:
- 查看系统:
wsl -l -v - 导出指定系统到指定位置:
wsl --export <Name> <目标压缩包绝对路径>,例如wsl --export Ubuntu d:\ubuntu.tar - 卸载当前版本:
wsl --unregister <Name> - 重新导入:
wsl --import <NewName> <TargetPath> <目标压缩包位置> --version <WSL版本>,例如wsl --import Ubuntu F:\Linux\ubuntu D:\Ubuntu.tar --version 2 - 设置默认登录用户(否则为root):
<系统Name> config --default-user <username>
然后可以彻底删除微软商店下载的ubuntu app
- 查看系统:
配置apt-get的镜像:
管理员身份进入:
cd /etc/apt备份自带的源:
cp sources.list sources.list.bak修改源配置:
vim sources.list替换内容为阿里云的源:
1
2
3
4
5
6
7
8
9
10
deb http://mirrors.aliyun.com/ubuntu/ bionic main restricted universe multiverse
deb http://mirrors.aliyun.com/ubuntu/ bionic-security main restricted universe multiverse
deb http://mirrors.aliyun.com/ubuntu/ bionic-updates main restricted universe multiverse
deb http://mirrors.aliyun.com/ubuntu/ bionic-proposed main restricted universe multiverse
deb http://mirrors.aliyun.com/ubuntu/ bionic-backports main restricted universe multiverse
deb-src http://mirrors.aliyun.com/ubuntu/ bionic main restricted universe multiverse
deb-src http://mirrors.aliyun.com/ubuntu/ bionic-security main restricted universe multiverse
deb-src http://mirrors.aliyun.com/ubuntu/ bionic-updates main restricted universe multiverse
deb-src http://mirrors.aliyun.com/ubuntu/ bionic-proposed main restricted universe multiverse
deb-src http://mirrors.aliyun.com/ubuntu/ bionic-backports main restricted universe multiverse更新软件列表:
apt-get update升级:
apt-get upgrade
配置SSH到外层主机
安装openssh-server
最好先移除先前的版本:
apt remove openssh-server安装:
apt install openssh-server修改配置信息:
vim /etc/ssh/sshd_config配置相关信息:
1
2
3
4
Port 2222 # 监听的端口,可以是其它的
ListenAddress 0.0.0.0 # 0.0.0.0 表示所有的地址
PasswordAuthentication yes # 把原来的no改成yes,意思是可以用密码登录
PermitRootLogin yes # 把原来的prohibit-password改成yes重启ssh服务:
service ssh restart
连接
- 在cmd或PowerShell:
ssh <子系统内用户名>@localhost -p <端口>,例如ssh taoyyz@localhost -p 2222
- 在cmd或PowerShell:
此时可以直接通过访问本机的2222端口ssh到WSL内的Ubuntu系统
系统服务操作
在 适用与 Linux 的 Windows 的子系统(WSL) 默认情况下是无法使用 systemctl 命令,使用该命令 WSL 将抛出如下错误。
System has not been booted with systemd as init system (PID 1). Can’t operate.
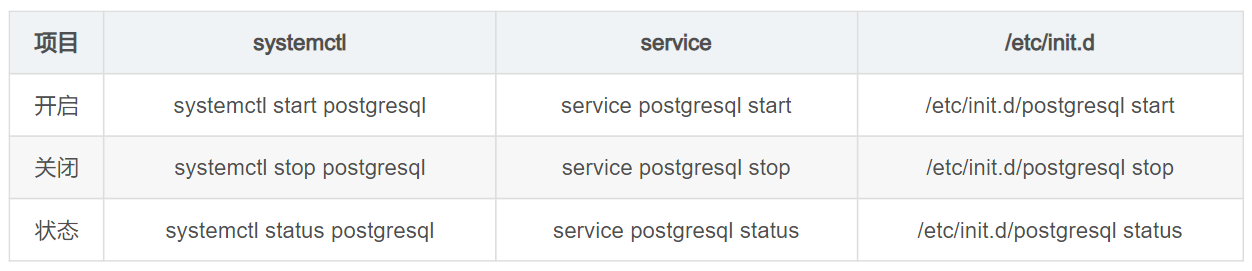
参考自CSDN:WSL 错误 System has not been booted with systemd as init system (PID 1). Can‘t operate
切换dash与bash
- 区别:
- dash:全称
Debian Almquist Shell,它主要是为了执行脚本而出现,而不是交互,它速度更快,但功能相比bash要少很多,语法严格遵守POSIX标准。 - bash:全称
GNU Bourne-Again Shell
- dash:全称
- 查看当前系统的shell解释器:
ls -l /bin/sh- 输出
/bin/sh -> dash为dash - 否则输出
/bin/sh -> /bin/bash为bash
- 输出
- 切换解释器:
- 切换为bash:
sudo ln -fs /bin/bash /bin/sh - 切换为dash:
sudo ln -fs /bin/dash /bin/sh
- 切换为bash:
性能与优化
- 开启systemctl
- 开机自启WSL
- 设置WSL的cpu和内存(默认全核心以及一半的物理机内存)
参考自CSDN:使用WSL2必看的配置优化
设置frp
- 后台运行:windows下也可以使用
nohup &包裹启动frp的命令 - 查看运行的nohup:
jobs -l - 关闭frp,也可以通过任务管理器中进程名称为
frpc.exe
我的当前frp配置
- 服务端:
http://116.63.171.90- 通信端口:
7000 - 管理台端口:
7002,使用http://116.63.171.90:7002访问- 用户名:
admin - 密码:
qwer2222
- 用户名:
- 通信端口:
- 客户端:
- 已开设的端口转发:
c2222 -> s2222:sshc2223 -> s99:nginxc9000 -> s9000:portainer
- 已开设的端口转发:
- 端口转发个人规则:
- 端口从99设置为nginx用
- 后端转发:
- 通过
远程ip:99/back_端口即可访问指定端口的后端服务
- 通过
- 后端转发:
- 端口从100开始:
100:redis101:mysql9000:portainer- 用户名:
admin - 密码:
3344520tjjTJJ
- 用户名:
- 端口从99设置为nginx用
已运行的个人服务
mysql
运行命令
1
2
3
4
5
6
7
8
9
docker run \
--name mysql_tjj \
-e MYSQL_ROOT_PASSWORD=taoyyz@028hhh \
-p 101:3306 \
-v /home/taoyyz/software/docker/mysql/conf/hmy.cnf:/etc/mysql/conf.d/hmy.cnf \
-v /home/taoyyz/software/docker/mysql/logs:/var/log/mysql \
-v /home/taoyyz/software/docker/mysql/data:/var/lib/mysql \
-e TZ=Asia/Shanghai \
-d mysql:latest
redis
运行命令
1
2
3
4
5
6
7
docker run \
-p 100:6379 \
--name redis_tjj \
-v /home/taoyyz/software/docker/redis/redis.conf:/etc/redis/redis.conf \
-v /home/taoyyz/software/docker/redis/data:/data \
-d redis:latest \
redis-server /etc/redis/redis.conf
portainer
运行命令
1
2
3
4
docker run -d --name portainer_zh_tjj -p 9000:9000 --restart=always \
-v /var/run/docker.sock:/var/run/docker.sock \
-v /home/taoyyz/software/docker/portainer-zh/data:/data \
6053537/portainer-ce
Redis性能测试
redis-benchmark
- 帮助
1 | [root@redis-test-slave ~ ]$ redis-benchmark --help |
- 案例
1 | Examples: |
浅玩了一下
本地docker内直接运行
redis-benchmark -t set -n 1000000 -r 100000000 -a taoyyz@028hhh,大约27w/s,平均响应时间0.11ms,最大响应时间3ms1
2
3
4
5Summary:
throughput summary: 270051.31 requests per second
latency summary (msec):
avg min p50 p95 p99 max
0.112 0.032 0.103 0.183 0.271 3.191服务器远程调用,大约1500rps,平均响应时间32ms
1
2
3
4
5
Summary:
throughput summary: 1503.56 requests per second
latency summary (msec):
avg min p50 p95 p99 max
33.243 28.736 32.543 37.471 47.615 264.703
安装Xshell
安装包
- Xshell安装包已经下载到我的
E:\破解软件\XshellPlus - 7.rar - 云盘:XshellPlus - 7.rar
- 安装方法:运行内部的bat脚本即可破解安装
可能出现的问题
- 由于找不到MSVCP110.dll,无法继续执行代码
- 原因:需要vc++的库
- 解决方法:下载vc++相关的库
- 库名称:
Visual C++ Redistributable for Visual Studio 2012 Update 4 - 链接:Surface运行库下载
- 踩坑:点击下载后,可选择x86、x64、arm的exe文件,但我只装了x64还不够,还同时需要装x86的库
- 安装包位置:已下载到
E:\破解软件\vc运行时库 - 参考了CSDN:xshell运行报错:由于找不到msvcr110.dll 无法继续执行
Git配置
给Git配置代理
当前项目的仓库
给Git当前项目的本地仓库配置代理
HTTP代理:
1
2
git config http.proxy 'http://127.0.0.1:10809'
git config https.proxy 'https://127.0.0.1:10809'SOCKS5代理:
1
2
git config http.proxy 'socks5://127.0.0.1:10808'
git config https.proxy 'socks5://127.0.0.1:10808'
取消当前项目的Git本地仓库的代理配置
1 | git config --unset http.proxy |
全局仓库
给Git全局仓库配置代理
HTTP代理:
1
2
git config --global http.proxy 'http://127.0.0.1:10809'
git config --global https.proxy 'https://127.0.0.1:10809'SOCKS5代理:
1
2
git config --global http.proxy 'socks5://127.0.0.1:10808'
git config --global https.proxy 'socks5://127.0.0.1:10808'
取消全局仓库的代理配置
1 | git config --global --unset http.proxy |
查看Git配置
查看当前Git仓库的配置
1 | git config --list |
查看全局配置
1 | git config --list --global |
安装Miniconda
Linux下
Miniconda官网下载对应系统的sh脚本
下载完成后,把sh脚本放到任意位置,然后执行以下命令添加执行权限并执行:
1
2chmod 777 Miniconda3-latest-Linux-x86_64.sh
sh Miniconda3-latest-Linux-x86_64.sh一路回车,注意有些地方需要输入yes
安装完成后,
~目录应该会有.condarc,并且~目录的.bashrc最后应该会有miniconda的路径此时执行
conda -v查看,如果命令没有找到,执行source ~/.bashrc使配置立即生效出现
PackagesNotFoundError: The following packages are missing from the target environment等问题,可能是源不正确,尝试:conda config --remove-key channels
参考了此链接
windows下
同样的,在miniconda官网下载安装包
下载完成后打开安装程序,过程中取消勾选了为当前用户安装(不推荐)
为所有用户安装后,可能需要自己配置环境变量,在环境变量中配置如下内容:
一个名为
MINI_CONDA_HOME的系统变量在
Path变量中,分别添加以下几条:1
2
3
4
5%MINI_CONDA_HOME%
%MINI_CONDA_HOME%\Library\mingw-w64\bin
%MINI_CONDA_HOME%\Library\usr\bin
%MINI_CONDA_HOME%\Library\bin
%MINI_CONDA_HOME%\ScriptsWindwos下会把Python和一些pip安装的包,映射为exe程序。所以依赖scripts文件夹
此时,在CMD中输入
conda应该可以访问到Miniconda的程序由于为所有用户安装,导致环境和包会默认下载到
C:\Users\当前用户\.conda文件夹中需要修改(没有则创建)
C:\Users\当前用户\.condarc文件,并填写内容:1
2envs_dirs:
- D:\env\miniconda3\envs此时仍然可能未生效,最好在创建环境时,使用绝对路径:
1
2
3conda create --prefix 目标环境文件夹的绝对路径 python=版本
# 例如:conda create --prefix D:\env\miniconda3\envs\py3.8 python=3.8
# 上述将创建一个3.8版本的Python环境到D盘环境的py3.8中去
常用操作
- 列举环境:
conda env list - 搜索包:
conda search 包名 - 创建环境:
conda create -n 环境名 python=版本号 - 切换环境:
conda activate 环境名 - 退出环境:
conda deactivate - 查看pip包安装位置和其他信息:
pip show 包名
安装homeassistant
环境:
安装homeassistant2023.8.4需要Python3.11版本,使用conda创建python3.11版本环境并切换
安装homeassistant需要的一些依赖:
运行
hass启动homeassistant服务访问
localhost:8123即可
CMD操作
- 切换盘符:
盘符:,例如切换到D盘:d:回车即可 - 查看当前文件夹内容:
dir - 查看命令所在位置:
where 命令